Once upon a time, there was a team of fearless R knights who started a new quest: they were missioned to bring the almighty Google Auth into the wonderful world of ShinyProxy. Here is their story, told from the inside.
In the beginning, there was a container
Table of Contents
For those amongst our readers who do not know ShinyProxy, this open source project by Open Analytics is designed to deploy a server which can run multiple Shiny Apps, and where each new shiny app is launched in a new session. In a few words, what ShinyProxy does is basically connecting a server to a list of Docker containers, and when a new user connects to the service and wants to open an app, a new container is run.
This process of “one user one container” allows to bypass the issue of R being single-threaded: on a classical Shiny App, if several users connect at the same time, the same R session is used. And if one launches a process that takes 15 seconds, the app is frozen for the rest of the users who need to wait for this process to be finished. You can find a nice example of this in Joe Chen – Scaling Shiny apps with async programming, which presents another way to handle this issue: async programming with the {promises} 📦.
I can hear your question: why would we need to deploy a Google Auth app with Shiny Proxy? There might not be that much computation in a dashboard context, and even if, we could still add more RAM. Well, no. If we deploy only one app, every user will have the same R session, meaning that once the first user is logged in, every new user coming to this app will be logged to the same Google Account.
Nothing that much complicated so far: once our Shiny App is developped, we just need to build a Docker image that runs it, copy it to the server, and let ShinyProxy do the rest (well, after a little bit of configuration, of course…).
The first subquest: run Google Auth in Docker
Our story begins with a simple Shiny App.
A story of non interactive session
Let’s draw a picture: we’ve got a Shiny App that connects to Google Analytics and builds a report. Here is a quick app, just for the example:
library(shiny)
library(googleAnalyticsR)
ui <- fluidPage(
  tagList(
    # hide the button after connection
    tags$script('Shiny.addCustomMessageHandler("hideButton", function(id) { $(id).hide(); });'),
    actionButton("connect", "Retrieve data"),
    verbatimTextOutput("list")
  )
)
server <- function(input, output, session) {
  observeEvent(input$connect, {
    account_list <- ga_account_list()
    output$list <- renderPrint({ account_list })
    # Hide the connection button once the connection is done
    session$sendCustomMessage(type = "hideButton", "#connect")
  })
}
shinyApp(ui, server)
Now we’d like to bundle this in a Docker. Because, remember, we need to put containers on our server, so that it works with ShinyProxy. But here is what happens when we try to launch our container:
Error in : Authentication options didn’t match existing session token and not interactive session
so unable to manually reauthenticate
Yes, by default, the “Google-related packages suite” by Mark Edmondson does not allow to connect in a non-interactive session. Let’s digress on that for a minute.
The manuscript of API connection
When you create an app on an API backend (that being Twitter, Facebook, or in our case the Google Developer Console), you get identification parameters (usually called a client id and a client secret). On this same app you need to define a callback URL, which is the URL the users go to once the authentification is done, and that will contain the access token. These elements are passed from one point to the other through URL parameters, which are the strange elements you sometimes see after the ? in your url.
In other words, if you own a site called A.com and want to establish a connection to an API on B.com, you’ll have to pass the connection info with B.com?bla=pouet&plop=12, B.com here being the endpoint of the API. When you open B.com with these params, B.com parses this URL, creates an access token blablabla, and opens the callback URL with the access token as a parameter (in our case, it opens A.com?blablabla). Once we are back on A, the URL is parsed and we have in A our access token to B.
When trying to connect to B.com from R, here is what happens (at least with {httr}):
- You give R your client id and secret
- R opens and listens to
http://127.0.0.1:1410 - R opens a browser to
B.com?id=this&secret=that - The website
B.comparses the URL, does its magic, and opens the callback URL with the token as a parameter - As you have defined on
B.comthis callback to behttp://127.0.0.1:1410,B.comopenshttp://127.0.0.1:1410?mytokenhere - As R is listening on this 1410 port, it receives the URL with parameters, parses these params, does a little bit of magic, brings back the token into the user environment, and creates a little file called
.httr-oauthwith everything in it.
Aaaand here’s the catch: when on a non-interactive session, R can’t open a browser nor a specific port in the host.
So, that explains the error we got just before: non-interactive R can’t open a web browser, and no .httr-oauth is found. One solution would be to create this file when in an interactive session, and copy it to the Docker image. But that means you could only get access to the google account you have previously connected. Not very scalable, as we want any user to be able to use our app.
(FYI, this, unfortunately, also happens with RMarkdown: when you knit your document, a new, non-interactive session is opened.)
Saved by {googleAuthR}
So, how can we bypass this? Maybe use JavaScript solution? That’s what Mark developed in his package: {googleAuthR} contains a module called gar_auth_jsand gar_auth_jsUI, which allows creating a button connecting to Google through JavaScript. On tadaa 🎉, this works.
Problem solved? Our heroes thought so, as they succeeded to deploy their application in a Docker. But their joy was short, because then came a feared but expected event: deployment with ShinyProxy.
Fighting the ShinyProxy dragon
Here we are: authorizing our server IP on the Google Console, setting the callback, and making our app work by launching a Docker. Because yes, Google Console asks for two things when it comes to authorization: the URL to come FROM to use OAuth, and an URL to go TO once the connection is done.
Launching our app into the wild
So now, we were ready to start what we fought was gonna be our last battle: configuring ShinyProxy, and launching the apps. And here we stopped, bewildered: our app could not connect to Google Auth. No authorization. Error 400. With our only help being a friendly robot that muttered weird incantations:
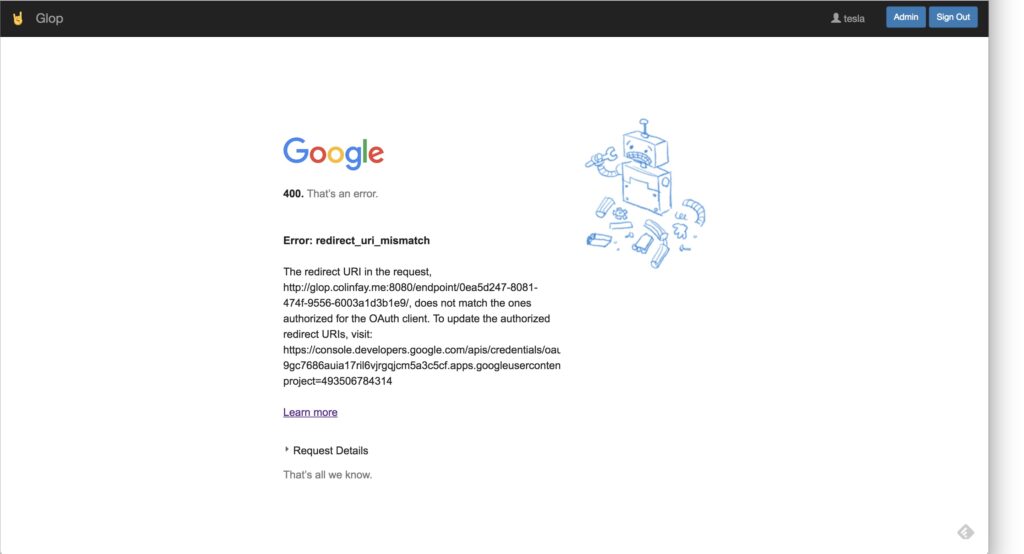
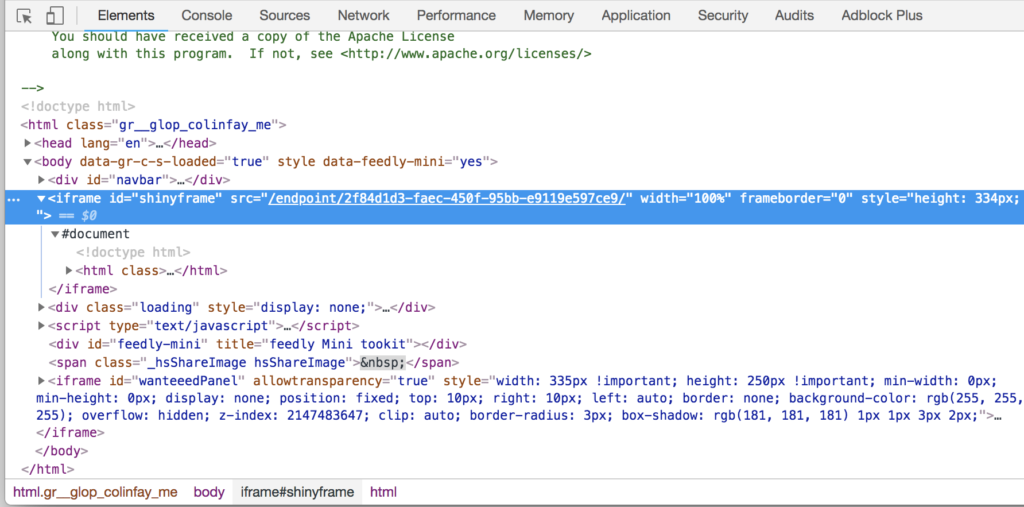
We endeavor to decipher the words this magic robot was telling us. And there it was: the issue. “The redirect URI in the request .../endpoint/0ea5... does not match the one authorized for the OAuth client”. Because yes, hidden from view, ShinyProxy creates an endpoint, appended to the end of your app URL for each instance of the app (which is not shown to the user):
![]()
So, that’s simple, can we just simply put this full URL as an authorized URL in the Google Console? Yes, we can. And it works.
But as you might have guessed, this victory was not a victory, and this adventure is not over yet.
A chapter on random endpoints
Here’s the new issue: ShinyProxy creates… random endpoints where it serves the app(s). That means that we can’t anticipate upfront the id of these endpoints. And, of course, the google console does not allow wildcards (that means you can’t put url/app/endpoint/* to specify that you want any URL that would match this expression).
We seemed to have come to a dead end: no wildcards on the Google Console, no way to predict endpoints ids (and even if, would we really want to copy and paste hundreds of ids?).
One idea came to our mind: what if we could access the Console through Command Line? If we could, we would simply have to get the id of the endpoint with JavaScript (it’s hidden at the top of the page), send it to R, authorize it to the Google Console programmatically, and then everything would be ok, and we could live happily ever after.
Though, the command line connection to Google Console was nowhere to be found. We screamed for help:
- https://stackoverflow.com/questions/52226508/google-developper-console-changing-authorized-uri-from-command-line
- https://support.openanalytics.eu/t/shiny-proxy-google-oauth/724
- https://twitter.com/_ColinFay/status/1038328941055041536
But the internet was not willing to answer our desperate call, and (thanks Mark for your answer!) Twitter pointed out that this might not be possible to access the Google Console through command line.
A happy ending
At this point of our story, our heroes might seem lost, without any chance of fulfilling their quest. But, in an unexpected turn of event, one of our brave khnight had an idea…
Dissecting {googleAuthR}
I couldn’t go along with “This is not possible”, and needed to find a way to solve this puzzle. And here comes a revelation: nowhere was it written that we should use only one shiny app to do this. We need two.
Let me explain: we use ShinyProxy because we want to control the connection, but also because we want each user to have its own R session, so that it’s easier to handle resources and auth. But Google Auth does not demand that much resources. So, aside these consuming Shiny Apps sent to a random endpoint of our server, we can have another Shiny app that just handles the connection. This shiny app is at a stable IP, so we can easily authorize it.
That, in theory, works. Well, if you can, of course, bring the token back from the Connection App to the main app. And make it easy for the user, with a friendly UI.
So here I was, dissecting the {googleAuthR} functions, just to identify one thing: what is the absolute minimum information R needs to create a token? And the answer is simple: a character vector defining the state of the connection, which is sent back to the callback URL as a parameter. So, if I get that, I can create a connexion (of course, you need to dig into {googleAuthR} internals and recode some elements to allow that). This is what our connection app will give to the user, who will only have to copy and paste this character vector into the main application.
And, to make it more user-friendly, let’s implement two little things
- The connection application does not open in a new tab/windows, but in a pop-up, which makes it a little bit more natural to the user, as it seems like you’re not opening a new app. As you can see here, I’m on two different ports of the server. Yet I can bet that 99% of the users won’t notice that.
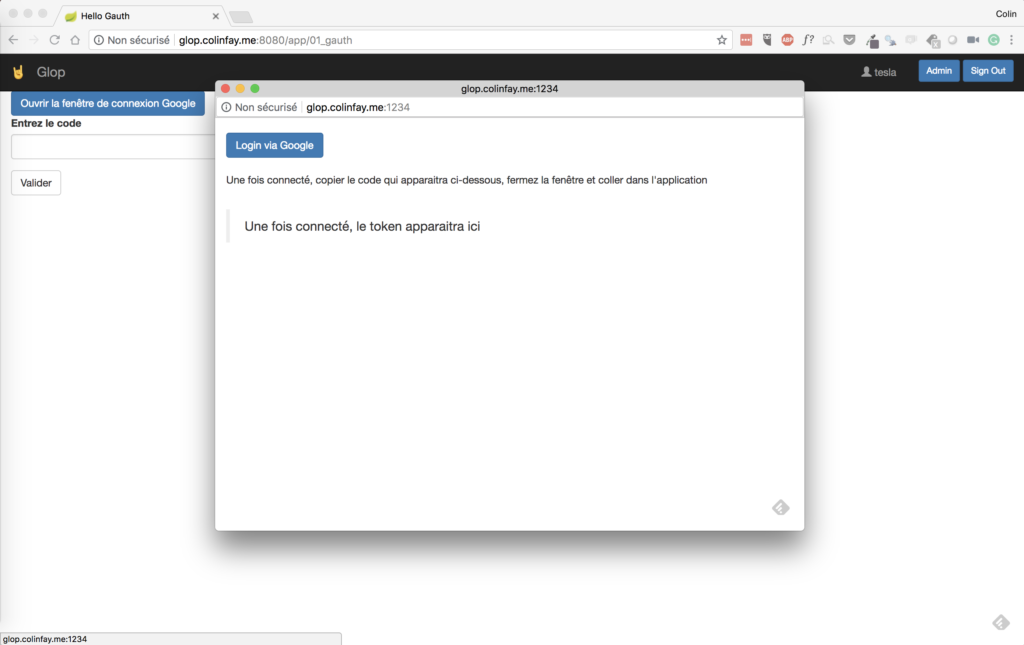
- Create a button to copy the token (just a little bit of JavaScript and it’s done)
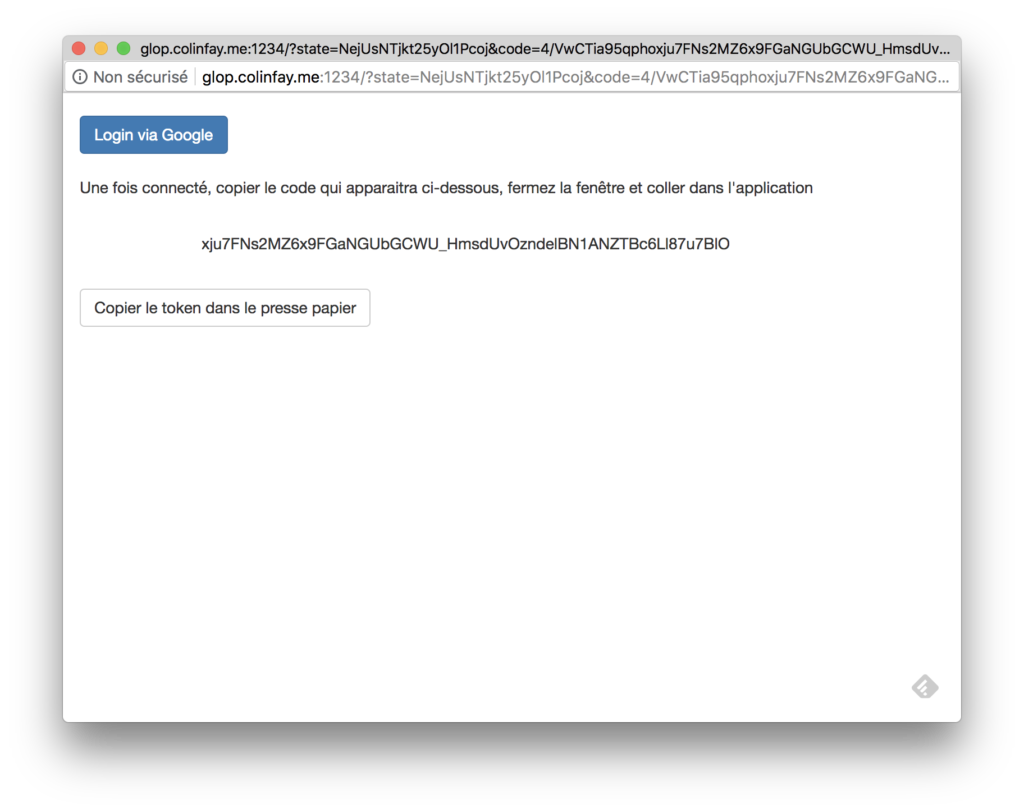
I have to admit it’s not optimal (well, compared to the interactive authentification), but IT WORKS, and at the end of the day doesn’t feel that unnatural or complex from a user point of view: click, click, click, click, paste, click, and we’re done.
It has been a good fight
Now that our heroes left for other exciting adventures, we hope their story would help you to conquer the almighty quest of bringing Google Auth to ShinyProxy. The moral of the story? Once faced with what seems like an unfulfillable quest, take a step back, get out of your shiny app, and maybe you just need to code another app.


