From prototype to production, make sure nothing breaks…
You’ve created a fantastic mockup and your client is delighted. You’re ready to move to production with your application. But one question haunts you: how can you ensure that your application will remain stable and functional through modifications and evolutions?
The answer comes down to one word: testing.
Three weeks ago, part of the ThinkR team was in Belgium to participate in the Rencontres R 2025. A conference around R whose objective is to offer the French-speaking community a place for exchange and sharing of ideas on the use of the R language across all disciplines.
On Tuesday afternoon, during a 15-minute presentation, I presented the use of testing in a Shiny application (presentation available in English and French). After several hours of preparation and a presentation, my mind was then test-oriented. At the end of the 3-day conference, I indulged in my second hobby (after R development): running. While I was running, a song played in my ears: Let’s Talk About Sex by Salt-N-Pepa. I could only hear: “Let’s talk about you and me […] Let’s talk about tests”. Professional bias? Surely.
Music at full volume, Let’s talk about tests!
Yo, I don’t think we should talk about this
Come on, why not ?
People might misunderstand what we’re tryin’ to say, you know ?
No, but that’s a part of life
[…]
Let’s talk about [tests], baby
Too often neglected in the R ecosystem, tests are nonetheless essential for guaranteeing the robustness and sustainability of your Shiny applications. In this article, we’ll explore a three-level testing strategy that will allow you to secure your code from development to production.
Why test your Shiny applications?
Table of Contents
The development of a Shiny application often follows the same path: you start with a quick prototype, you iterate with your client (or yourself), you add features… and suddenly, you realize that your code has become complex and fragile.
Each new modification risks breaking an existing functionality. Each feature addition makes you fear introducing regressions. This is where tests become your best ally.
The advantages of a testing strategy
A well-thought-out testing strategy allows you to:
- Progressively validate your code at each development stage
- Detect regressions before they reach your users
- Refactor with peace of mind knowing that your tests will alert you in case of problems
- Document the expected behavior of your application
- Facilitate maintenance and future evolutions
Overview
To effectively secure a Shiny application, we recommend a three-level approach:
- Unit tests: Validate each function individually
- Integration tests: Verify interactions between components
- End-to-End tests: Simulate a real user in a real browser
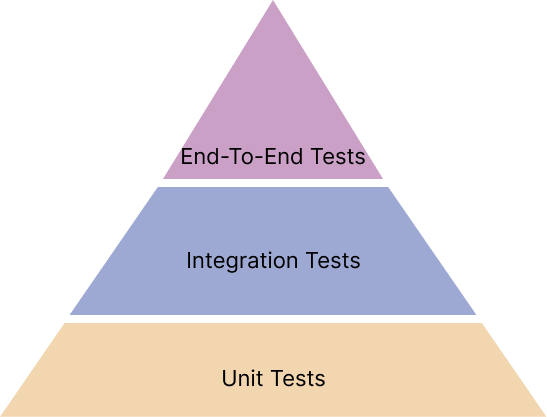
Each level has its role and specificities. Together, they form a complete safety net for your application.
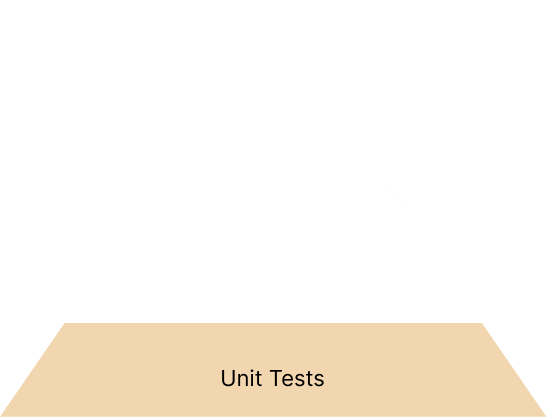
Level 1: Unit tests
The principle
Unit tests consist of testing each function in isolation, independently of the rest of the application.
It’s like checking that a drawer opens correctly before installing it in a kitchen.
Implementation
If you follow best practices and develop your Shiny application as a package (with {golem}), unit tests integrate naturally into your workflow.
Let’s create our first application:
# install.packages("golem")
golem::create_golem(path = "myShinyApp")
Once this code is executed, your package will open in a new session. You can immediately verify that your application launches correctly:
# Launch application in dev mode
golem::run_dev()
In {golem}, the development cycle is found in the /dev folder. You’ll find all the functions you’ll need for development there.
The first file to follow is the dev/01_start.R file. It contains all the functions you’ll need to start your project. Among them is the function: golem::use_recommended_tests(). This function will create the test structure in your package, with tests recommended by {golem} including one that verifies that your application will launch correctly. Convenient!
Let’s imagine we need a function in our application: calculate_average(). We can execute: usethis::use_r("calculate_average") to create the file that will contain our function.
# In R/calculate_average.R
calculate_average <- function(values) {
    if (!is.numeric(values)) {
        stop("values must be numeric")
    }
    if (length(values) == 0) {
        return(0)
    }
    sum(values) / length(values)
}
This function calculates an average. It has some “validators” to check the function inputs. To associate a unit test with it, we can execute: usethis::use_test(name = "calculate_average")
# In tests/testthat/test-calculate_average.R
test_that("calculate_average works correctly", {
  # Test with numeric values
  expect_equal(
    object = calculate_average(
      values = c(10, 20, 30)
    ),
    expected = 20
  )
  # Test with empty vector
  expect_equal(
    object = calculate_average(
      values = 0
    ),
    expected = 0
  )
  # Test with non-numeric input
  expect_error(
    object = calculate_average(
      values = c("a", "b")
    ),
    "values must be numeric"
  )
})
To verify that the calculate_average function works as expected, we run the tests:
devtools::test()If the tests are successful, we get:
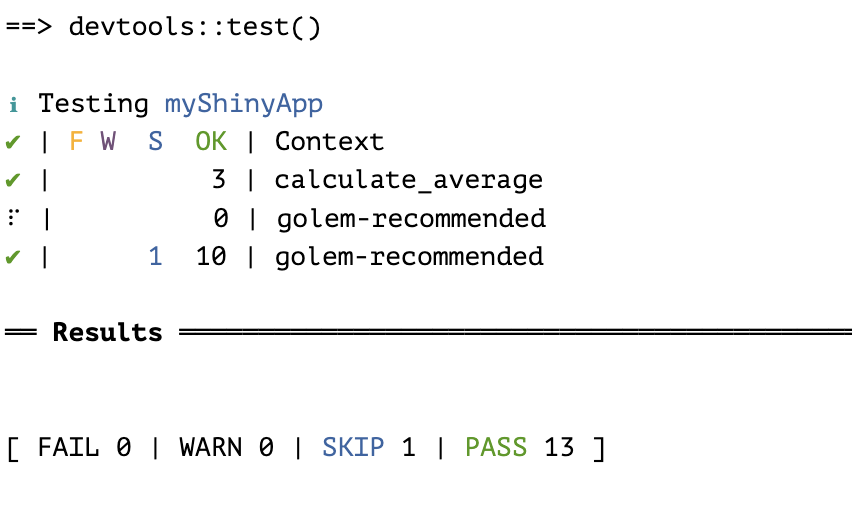
You can modify/break a test to see and experiment with a failing test!
Replacecalculate_average(values = c(10, 20, 30))withcalculate_average(values = c(10, 20, 1))to see the result.
At this stage, unit tests allow us to test the business functions of our application. We don’t test the application per se, but we ensure good behavior of its business logic.
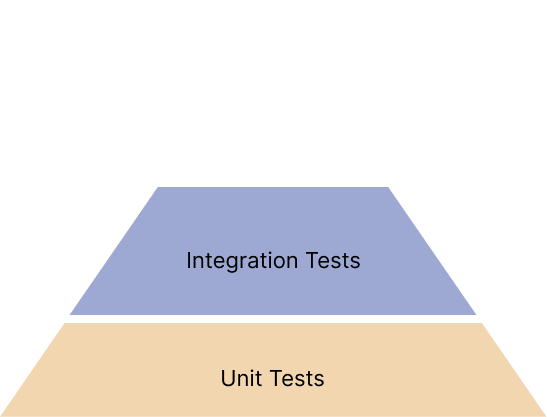
Level 2: Integration tests
The principle
Integration tests verify that the different components of your application work correctly together. In Shiny, this means testing reactive flows, interactions between modules, and server logic.
We’ve checked if the drawer could open correctly. We’re now going to verify that it integrates correctly with the rest of the kitchen furniture: the other drawers, the worktop, etc…
Implementation
Let’s modify our application a bit!
In the R/app_ui.R file, replace the golem::golem_welcome_page() function with the following code:
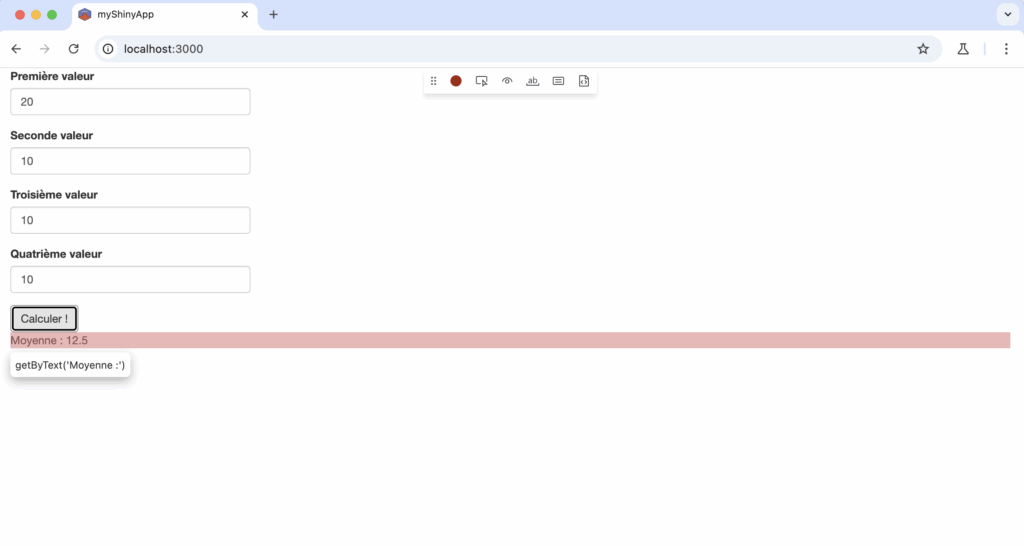
numericInput(inputId = "num1", label = "First value", value = 10),
numericInput(inputId = "num2", label = "Second value", value = 10),
numericInput(inputId = "num3", label = "Third value", value = 10),
numericInput(inputId = "num4", label = "Fourth value", value = 10),
actionButton(inputId = "go", label = "Calculate!"),
textOutput(outputId = "result")
This should give:
app_ui <- function(request) {
  tagList(
    golem_add_external_resources(),
    fluidPage(
      numericInput(inputId = "num1", label = "First value", value = 10),
      numericInput(inputId = "num2", label = "Second value", value = 10),
      numericInput(inputId = "num3", label = "Third value", value = 10),
      numericInput(inputId = "num4", label = "Fourth value", value = 10),
      actionButton(inputId = "go", label = "Calculate!"),
      textOutput(outputId = "result")
    )
  )
}
We’ve just added 5 inputs including 4 inputs to enter a numeric value and an action button. Finally, a textOutput will allow us to display text.
Be careful to put a comma between the different elements of your UI.
To verify that this code works, we can launch the application:
# Launch application in dev mode
golem::run_dev()
It’s time to connect the UI part of our application with the server part. For this, in R/app_server.R:
app_server <- function(input, output, session) {
  rv <- reactiveValues()
  observeEvent(input$go, {
    rv$avg <- calculate_average(
      c(input$num1, input$num2, input$num3, input$num4)
    )
    showNotification(
      "Calculation completed!",
      duration = 3
    )
  })
  output$result <- renderText({
    req(rv$avg)
    paste("Average:", rv$avg)
  })
}
This code just created a reactiveValues(), a box that will store the different results in our application. When the button is clicked, the code inside the observeEvent will be executed. We store the result of our calculate_average function in the reactiveValues.
# Launch application in dev mode
golem::run_dev()
The testServer() function
Shiny provides the testServer() function which allows testing server logic without launching the user interface.
In a new file usethis::use_test(name = "server"), copy the following code:
testServer(app_server, {
  session$setInputs(num1 = 5)
  session$setInputs(num2 = 5)
  session$setInputs(num3 = 5)
  session$setInputs(num4 = 5)
  session$setInputs(go = 1)
  expect_equal(
    object = rv$avg,
    expected = 5
  )
  session$setInputs(num1 = 10)
  session$setInputs(num2 = 20)
  session$setInputs(num3 = 30)
  session$setInputs(num4 = 12)
  session$setInputs(go = 2)
  expect_equal(
    object = rv$avg,
    expected = 18
  )
})
This test simulates values for the different inputs in the server and also simulates a click on the button session$setInputs(go = 1).
We then expect the result stored in the reactiveValues to be 5:
expect_equal(
  object = rv$avg,
  expected = 5
)
As before, to run the tests in our application, we execute:
devtools::test()
You can always break a test to experiment with a failing test!
Replacesession$setInputs(num3 = 30)withsession$setInputs(num3 = 2)to see the result.
This integration testing logic with testServer can also be used with modules in Shiny! Complete and more complex applications can therefore be tested.
We’ve just tested the nested interactions in the application and particularly the different interactions. However, this remains very “programmatic” and doesn’t reflect the real experience of a user in a browser.
Level 3: End-to-End tests
The principle
End-to-End tests simulate a real user interacting with your application in a real browser. This is the testing level closest to the final user experience.
The objectives are multiple here:
- Simulate real user interactions
- Test the application in a real browser
- Verify the complete user experience
We’ve checked the drawers individually. We’ve also verified that they could all be assembled together. Now, it’s time to test cooking a real meal in the kitchen!
Playwright and the {pw} package
For E2E (End-to-End) tests in the R ecosystem, we recommend using Playwright via the {pw} package developed by ThinkR.
Installation and configuration:
# Package installation (in development)
devtools::install_github("ThinkR-open/pw")
# Initialize test structure
pw::pw_init()
This command creates the following structure:
tests/
├── playwright/
    ├── tests/
        ├── default.test.ts
└── testthat/
    ├── test-calculate_average.R
    ├── test-golem-recommended.R
    ├── test-server.R
    └── test-playwright.R
E2E tests should be placed in the playwright/tests/ folder. A test is already available, it contains:
import { test, expect } from '@playwright/test';
test('has body', async ({ page }) => {
  await page.goto('http://127.0.0.1:3000');
  await expect(page.locator('body')).toBeVisible();
});
This code will launch the application in a browser and verify the presence of our body. We can already run this test:
pw::pw_test()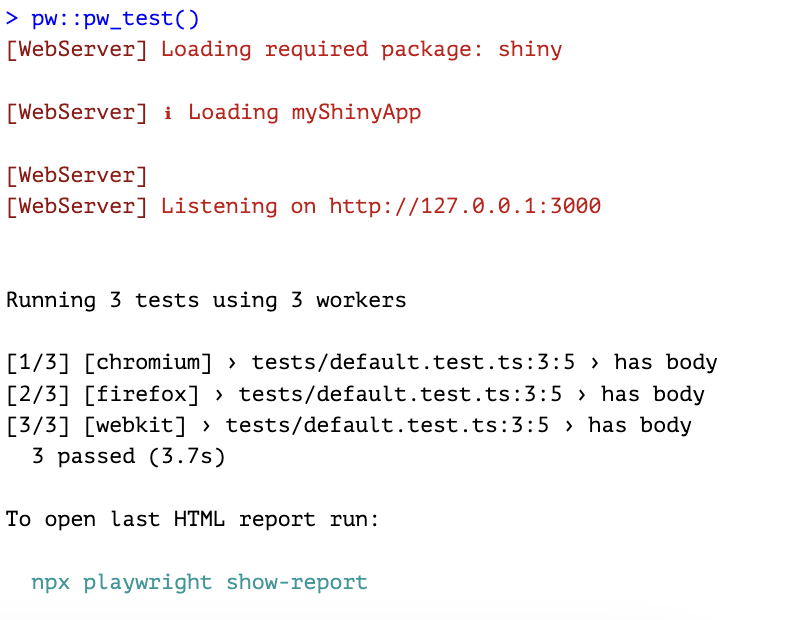
Playwright also provides a report that we can consult:
pw::pw_show_report()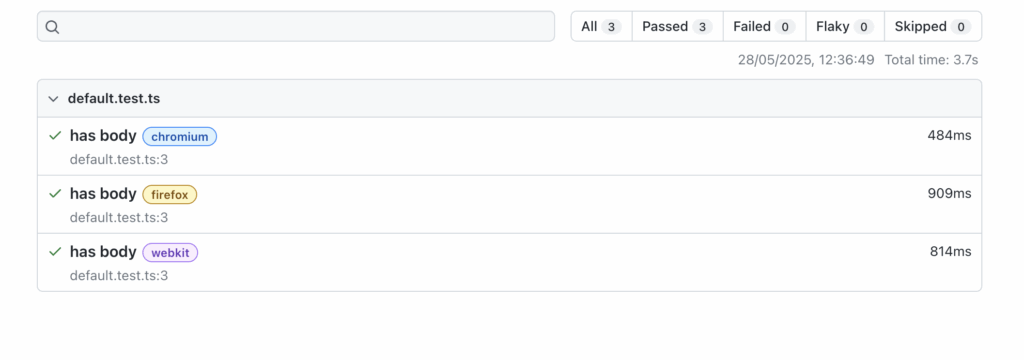
Playwright runs this test in 3 different browsers: chromium, firefox and webkit.
OK, but how do we test our application?
Good news, you don’t necessarily need to learn TypeScript to produce E2E tests with Playwright:
pw::pw_codegen()This function will open a browser, in which we’ll be able to simulate clicks and actions, as a user.
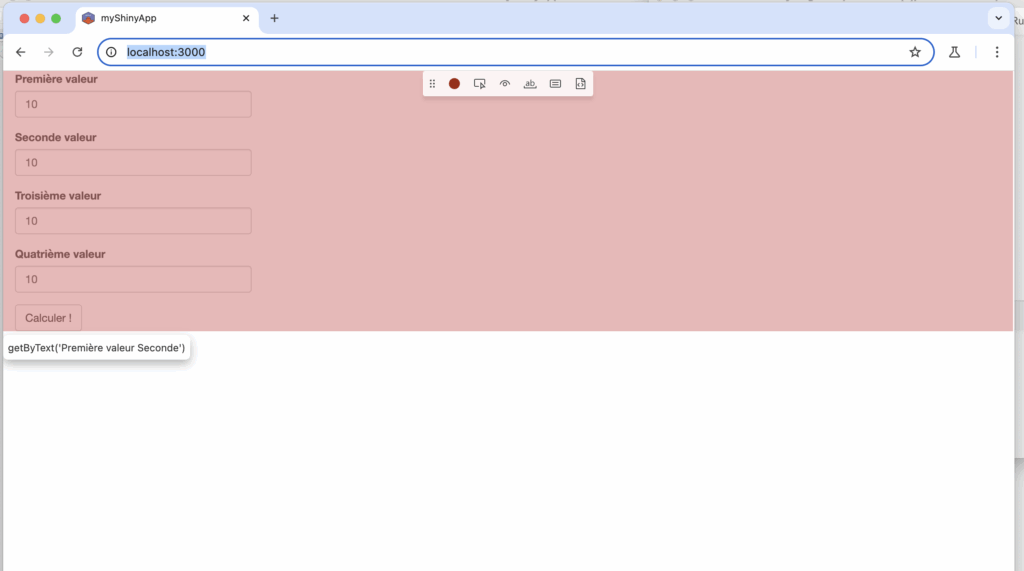
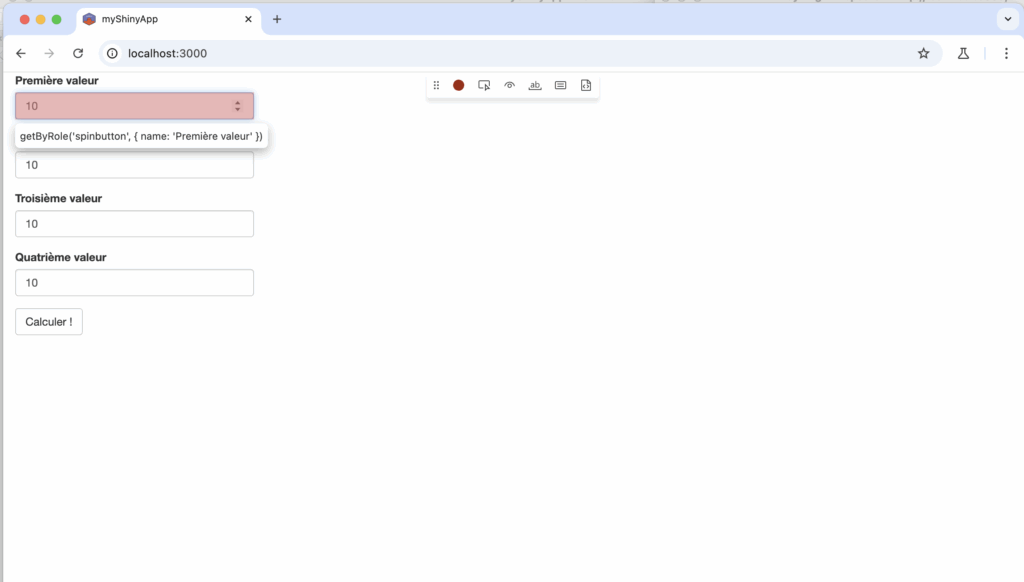
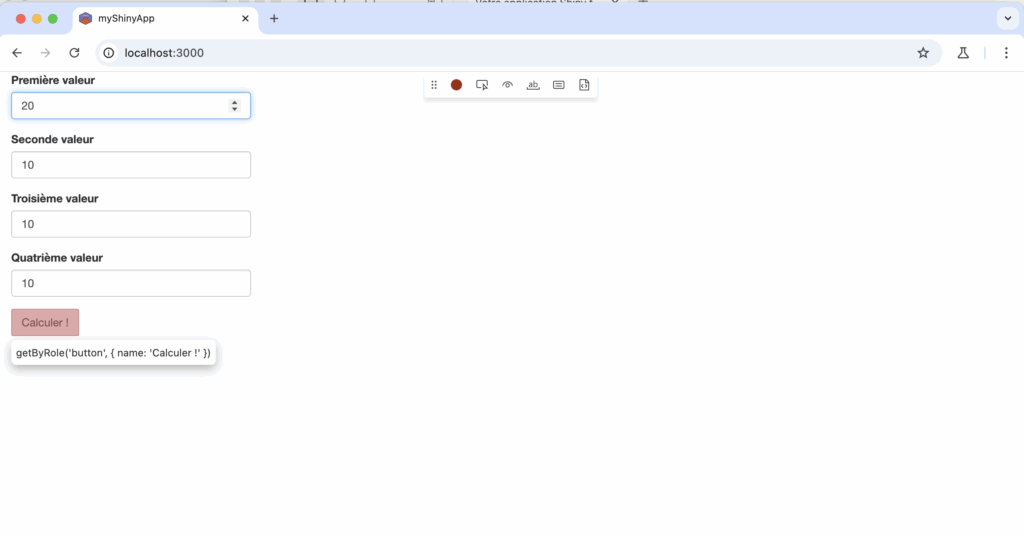
Playwright will record our actions and store them in a new file in tests/playwright/tests:
import { test, expect } from '@playwright/test';
test('test', async ({ page }) => {
  await page.goto('http://localhost:3000/');
  await page.getByRole('spinbutton', { name: 'First value' }).click();
  await page.getByRole('spinbutton', { name: 'First value' }).fill('20');
  await page.getByText('First value Second').click();
  await page.getByRole('button', { name: 'Calculate!' }).click();
  await page.getByText('Average:').click();
});
This test is far from perfect and we’ll return in a future article to the syntax of tests with Playwright and how to optimize them. E2E tests also work in CI and we’ll also return to this in a future article.
Meanwhile, our application here is tested in a context that comes closest to the reality of our future users. We’ve just secured the proper functioning of the application, both on business logic and on the UI part.
We can run all the tests in our application:
devtools::test()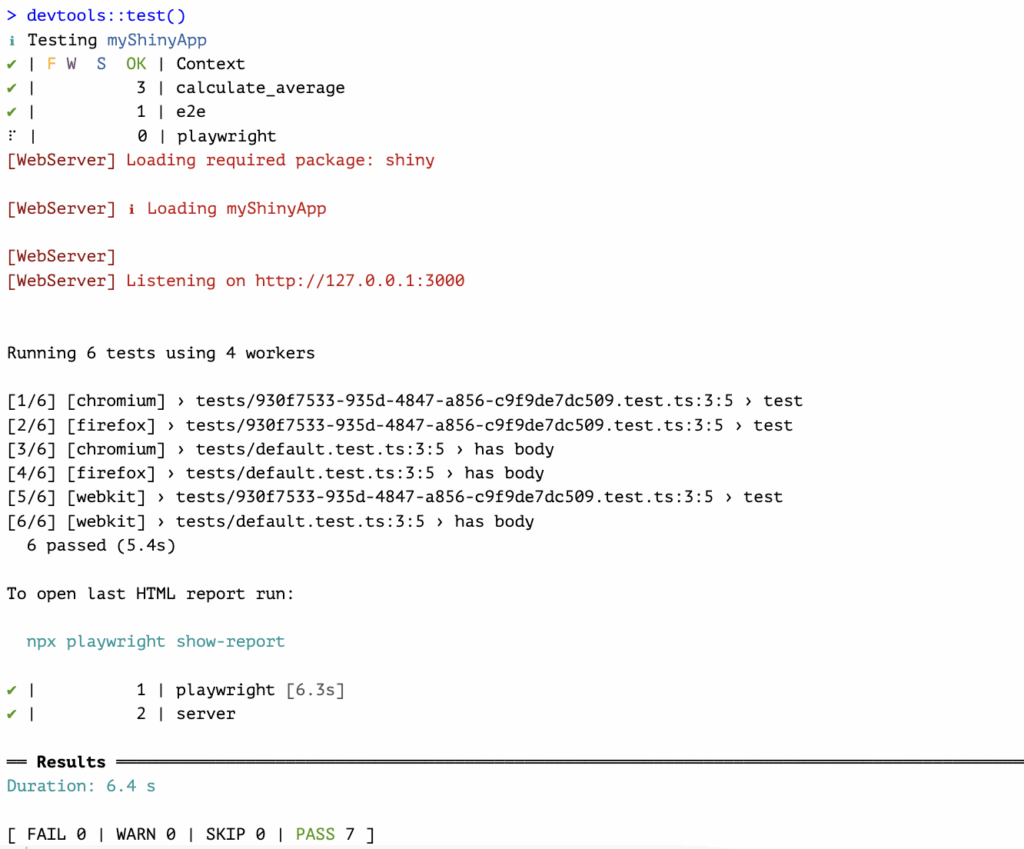
Recommended testing strategy
Effort distribution
A commonly accepted rule in the industry is the test pyramid:
- 70% unit tests: Fast, reliable, numerous
- 20% integration tests: Focus on critical interactions
- 10% E2E tests: Essential user journeys
What to test at each level?
Unit tests:
- All utility and business logic functions
- Data transformation functions
- Calculation algorithms
- Input validation functions
Integration tests:
- Main reactive flows of the application
- Interactions between Shiny modules
- Complex server logic
- Reactive values updates
End-to-End tests:
- Critical user journeys
- Complete workflows (login, calculation, export)
- Complex features involving multiple interactions
- Regression tests on major bugs
Conclusion
Implementing a three-level testing strategy radically transforms how you develop and maintain your Shiny applications.
Concrete benefits:
- Confidence in your code and modifications
- Speed of problem detection
- Ease of maintenance and evolution
- Improved user quality
To start today:
- Structure your Shiny application as a package with
{golem} - Add unit tests for your critical functions
- Implement some integration tests with
testServer() - Experiment with E2E tests via
{pw}for your main user journeys
Don’t hesitate to contact us if you want to deepen the implementation of tests in your Shiny applications!
You can also find Colin Fay who will lead a workshop on Wednesday, October 8, 2025 during the Shiny In Production conference organized by Jumping Rivers.
You can also find all our training courses on Shiny application development here!